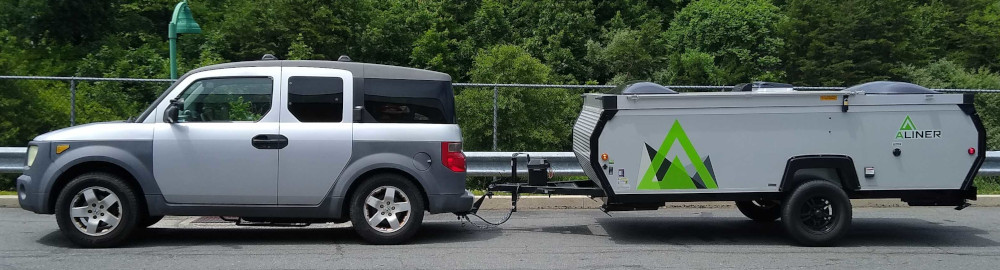
It takes a while to ´learn´ a new camper, and to figure out what works for you. Here are various things we´ve done to make our Aliner work best for us.
Here´s the list (with details following):
1. Overhead Lighting
2. Shoe Storage
3. Step Stool
4. Whisk Broom
5. Insulation/Felt
6. Small Tubs
7. Get a Duvet (really!)
1. Overhead (and other) Lighting
We added a removable shower rod above our heads, from which we suspend a lantern. The rod sits in closet rod cups which are attached to the side walls with hook and loop tabs. Suspending the lantern from an S hook lets our shorter partner reach it.
There are bright lights at the front and back of our Aliner, but the lantern is our main light inside the camper. It´s softer and we like having it in the middle of the room. The rod also gives us a place to hang jackets if we want to.
Though the rod is not strictly necessary, it also theoretically adds a little stability across the peak of the camper. Our Scout has exterior wind bars, though, which are highly recommended, so it´s unlikely that this rod adds much more than a convenient place to hang things.
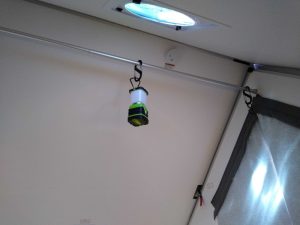
Photo of a pole stretching from side to side
in an Aliner. A green and white battery-powered lamp is suspended
from the pole on a large ´S´ hook.
That lantern looks far away — the Aliner has an 8 foot (2.4 meter) roof apex!
Reviews suggested that these lanterns might have a quality control issue, so I bought four just in case. They´ve all been great for us: we suspend the one, keep one on the counter, and keep one on the table, and still have a spare we´ve not yet needed.
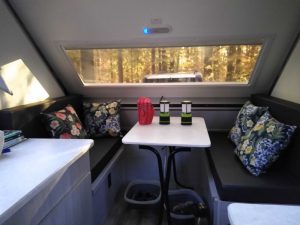
Photo of the dinette end of an Aliner Scout showing
three lamps on a table. The left-most lamp is wrapped
in a red bandana to allow use when someone
is still sleeping in the camper.
These lanterns have several settings, all quite bright. We wrap a red bandana around the one on the table, which lets the later sleeper, and the early riser, each read while the other sleeps undisturbed by light in the camper.
2. Shoe Storage
A first, we used collapsible plastic tubs, tucked under the table, for our shoes. This worked fine (the tubs are out of the way, and collapse flat when not in use).
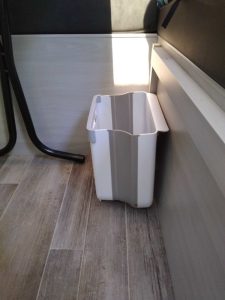 Photo of gray and white plastic bin held in place by hidden
knobs against the lower part of the dinette couch, under the table.
But we ended up with a better solution for shoes, which will turn up in a later post.
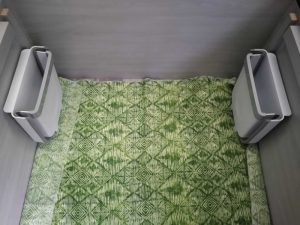
Photo of two gray and white buckets installed against the
far lower edge of the dinette couches, folded against the
lower panels. A green canvas cloth covers the area beneath
the table. It´s not in place when we are camping; we store pillows
there, and the cloth keeps them clean.
We now use the buckets for other things — the books we don´t want to leave on the table, for example — and I´ve left this here because that might work well for others, too.
3. Step Stool
We carry a small step stool which allows both of us to easily reach that 8 foot high ceiling and whatever light items we might hang from the support pole.
4. Whisk Broom
This over-large whisk broom (bought at the RV dealer) acts as a picnic table whisk, and a basic broom for the camper. Indispensable!
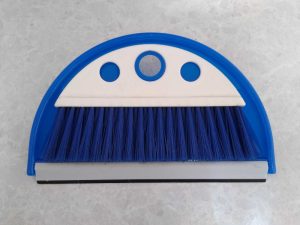
Photo of a wide blue plastic dustpan. A white-handled
whisk with blue bristles is set into the dustpan.
The vinyl floor, like any vinyl flooring in a brick-and-mortar home, is destroyed by grit. This handy brush makes fast work of the many times a day the Aliner needs brushing out.
5. Insulation/Felt
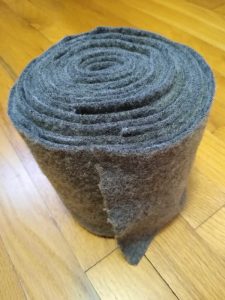
Photo of a roll of gray wool/rayon felt.
We woke up, the morning after the first time we´d used our Aliner, to find that all the metal surfaces were drenched. Our first night was spent in a thunderstorm, and the various forces outside, combined with our warm bodies inside, had created major condensation. It was a shock!
It was also easily coped with. We got home, wiped down the surfaces, and left the Aliner up until it was fully dry. Now we know that we should have left the fan slightly open while we slept, and that the Aliner is easily insulated with our felt, foam pipe insulation or pool noodles, which should solve the problem. For easier use and storage, we´re carrying a roll of wool/rayon felt to install around the problematic edges.
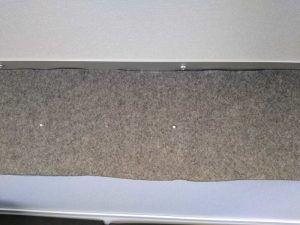
Photo of a strip of felt set across the lower part of
the roof, just above the Aliner fold hinge. Small dots
across the middle are where the tri-fasteners poke
through the felt to hold it in place.
Tri-fasteners in the middle of the horizontal bar across the camper are part of the Aliner construction; putting a small horizontal slit in the felt where each one sits gives the felt a hold on the wall. Setting the strips up is fast and easy — the felt pops over the fasteners to keep it in place.
Don´t try using the stiff, completely synthetic felt you buy at a hobby store. It won´t absorb anything; you want something that will catch the condensation, not let it roll off onto you.
For newbies, too: Double check that the apex of your Aliner has correctly snapped into place. It might seem to have without actually having clicked that last millimeter. We´re not sure this figured into our initial issue, but it may have, so now we´re careful to be sure everything´s in place as it should be.
Some people have gone to the extreme (imho) of attaching carpet tiles to the affected areas, but I´ve opted for felt strips which fit neatly across the broad bands front and back, and are removable for drying. But I hate carpet, so your mileage may vary.
We have the luxury, generally, of opting to not camp in rain, but we´re prepared if it comes up again, so we just have the insulation and felt handy if needed. It´s a very quick job to put either or both in place, and to remove them.
Note: Since learning that it´s critical to leave the fan slightly open in damp weather, we have never again experienced a condensation issue, so our felt roll has remained unused. Humans respirate and sweat; the damp air we create needs to circulate and leave the camper; allowing air out makes all the difference.
6. Small Tubs
In line with our minimalist approach, we pack our camping needs in plastic storage tubs. Light, cheap, tubs! Not only are these easier to manage than large tubs, they´re very much lighter. Four of them slip under the bed for easy access in the camper, creating an easy-to-use ´dresser´ set-up. It´s nearly as easy as using drawers!
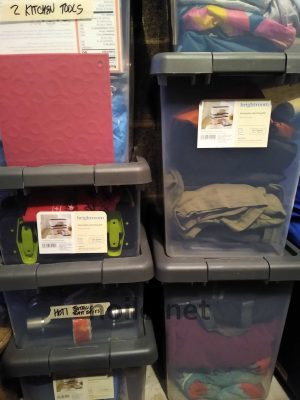
Photo of several transparent storage bins with gray covers
with various types of camping gear stored inside.
The bins make transporting, packing, and general loading and unloading so easy and efficient! Most just stay in the tow vehicle in camp; moving the few we use in the Aliner is quick and easy when setting up camp.
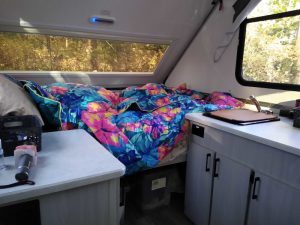
Photo showing bed end of our Aliner camper. The bed lies below
a picture window, covered with two brightly-colored duvets in blues
and tropical fuchsia, purple, and pinks. Barely-seen tubs are under
the bed; one that can just bee made out has a white label. To the
right are light-colored cabinets and a counter with a sink, which is
temporarily covered with a cutting board. To the left is another
counter, with cabinets under. Unseen is the camper door, just to
the right of the left counter.
We use ten in small and medium sizes, and take just the four under-bed bins into the camper. Toiletries, removed from another tub, go into the upper shelf on one cabinet, and that tub, empty, goes back into our truck while we camp.
7. Get a duvet (or two — as above)
Seriously. One for you, and two if there are two of you. Even if it´s full-sized, a camper bed is likely to feel a bit more cramped to use than a bed in a conventional home, and a duvet can make life much simpler. It´s not easy to make a camper bed look tidy, but a tossed duvet is a quick way to make a bed look, well, better, without spending fifteen minutes tidying up several layers of bedding.
Better still, with a duvet for each sleeper, no one is left out in the cold when the other tosses and turns. A duvet is the best defense against blanket-stealing, and a big step forward in camper sleeping comfort!
(Extra life hack: a duvet for each of you at home eliminates all bedding-stealing-temp-differences sleep hassles at home, too! They are bliss. Trust me.)
Copyright 2026; All Rights Reserved. This blog is written by a human, without AI input. Please respect the gift offered here of content without cost to you, and do not re-post or copy without permission. No one pays me for this content, and I have no commercial, or other, affiliation with any product mentioned here.